Cake Case Tutorial
This is also a great start before a cake bag project. Coming sometime soon: how to make a cake bag! Check out my Instagram for cake bag ideas!
Yarn
Any size!
Try to get anti-pill yarn to withstand the handling and rubbing of the case.
I use light weight for this case.
Hook size
Use a much smaller hook than the manufacturer's recommendation to create tight tension, which also helps reinforce and maintain the shape of your case (if it’s not very sturdy).
For light weight yarn, use a 3 mm hook.
For medium weight yarn, use a 4 mm hook.
Glue
Hot glue or textile glue
Case
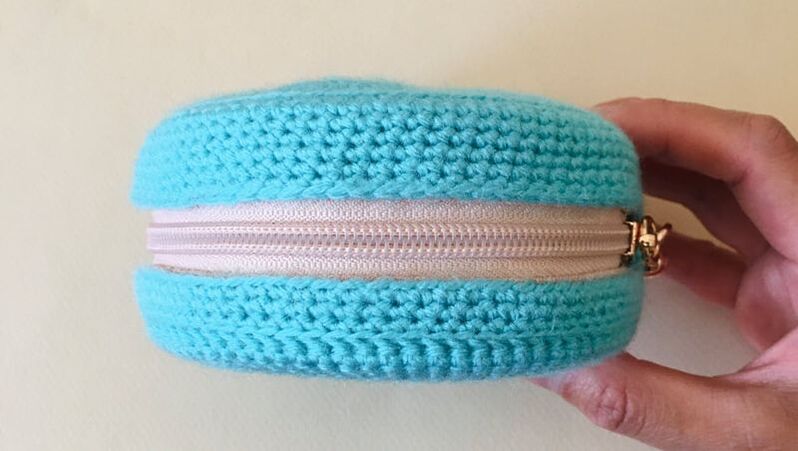
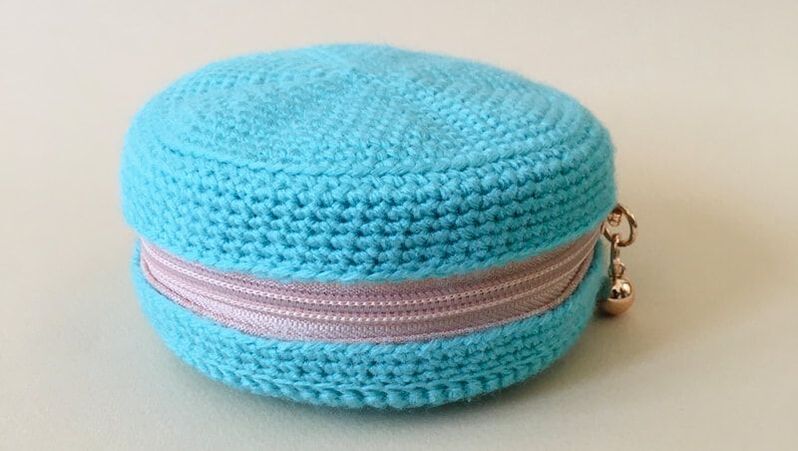
Get a very sturdy case so that your cake keeps its shape. Also, try to get a plain case, one without a print or design so it will not show through your work. Here I use a 4.5”/11.43 cm case.
I picked a challenging example to help you tackle any case you have:
1) It’s semi-sturdy, but still viable because I stuff it to make it firm before I start the project. My finished crocheted piece will have tight tension and when it’s glued to the case, it will help keep the cake's shape.
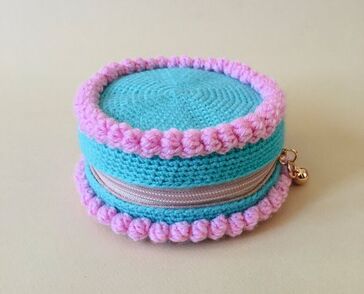
2) It has a print. The flower can probably show through my work, especially if I use light colored yarn. I decide to use turquoise, a darker shade, and the design does not peek through my stitches.
3) The print is also a bas-relief. I can add toppings or a second thickness of frosting of a contrasting color if the flower design makes the top of the cake bumpy. I can also have the bas-relief design at the bottom of my cake.

Pattern
I use my Basic Cake Recipe pattern with puffy icing #2 and work in the round without joining, which yields consistent stitching and a smooth surface. Use a stitch marker to help you indicate the beginning or end of each round.
I begin by working the top of the cake until I reach just before the edge of the case so that my crocheted piece stretches over the case and fits very snugly. I then work in back loops for 1 row to begin the side of the cake. I like my back loops just near the edge so that when I stitch my icing using the free loops (unworked front loops), it rests on top of the cake and doesn’t hang over.
Working Around the Zipper
This could be an easy step! You do not want to crochet over the zipper. Thus, you’ll be creating an open mouth to your crocheted piece for the entire zipper area. An easy way to do this is to stop and turn when you get to the zipper and repeat this kind of short round until you have an open space for the zipper, but it will create the look of alternating right side and wrong side rows.
Instead, I work in continuous rounds throughout my cake, creating uniform stitches. When I reach the zipper area, I align my crocheted piece so that it’s at the end of a round and the beginning of the next round.
I begin my next round not with the usual single crochet stitches, but instead with chains to match the length of the zipper. Very important: the number of chains I work is the number of stitches I skip in the previous round. For example, if I work 80 chains to match the length of the zipper area, I skip 80 stitches in the previous round and then join the previous round at the 81st stitch with a single crochet. I then continue the round with single crochet stitches, working in the previous row, until I reach the end of the round.
For the next round, I repeat by chaining to the length of the zipper area (same number of chains as the first row of chains) and once again working single crochet stitches around the case, working in the previous row, until the end of the round. I repeat this until I have enough rows that match the height of the zipper area. In other words, I chain along the length of the zipper area and continue and finish the round working in the previous row using once again single crochet stitches.
After I finish crocheting around the zipper area, I continue with the side of the cake and work single crochet stitches in the last row of chains. I continue working in a spiral, adding enough rows until I reach near the bottom of the case and fasten off. ‘Near’ because I want to stretch my crocheted piece to fit snugly over the case.
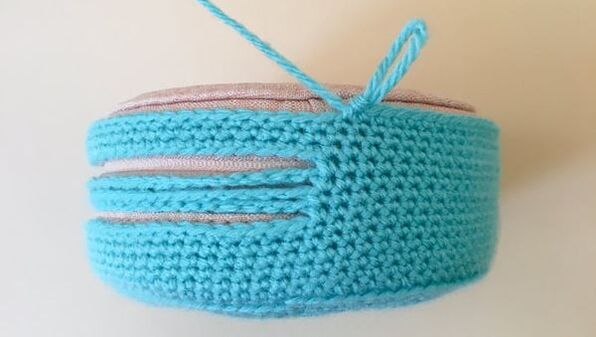
I now made the open mouth needed for the zipper area while maintaining continuous rounds, without turning, to create a consistent look of stitches. Later, I cut the chains and weave in the ends.
Working the Bottom of the Cake
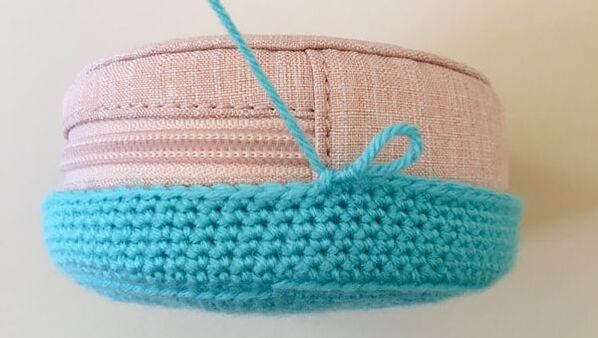
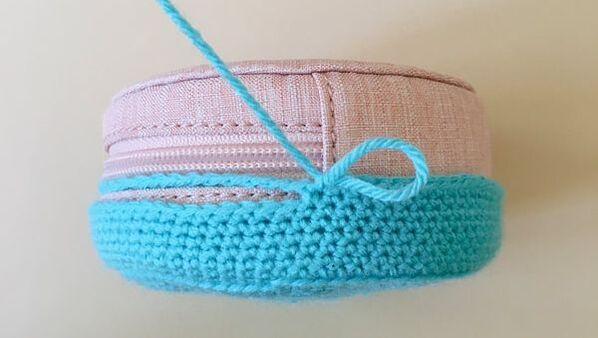
I work the bottom of the cake the same way I did with the top of the cake using the Basic Cake Recipe pattern until I reach almost the edge of the case. Again, ‘almost’ at the edge because I want my crocheted cake to stretch and fit tightly over the case. I fasten off with a long tail. With the wrong side facing out, I stitch the bottom of the cake to the first piece.

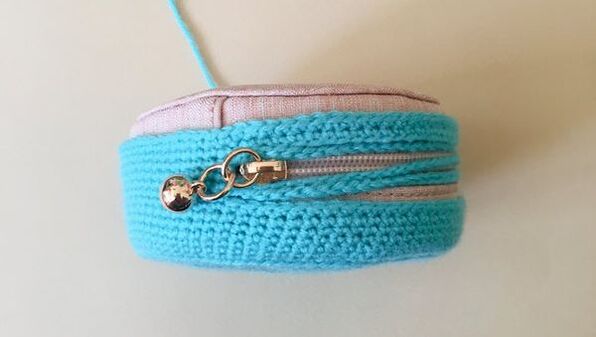
Next, I cut the chains and weave in the loose ends. These ends won't unravel because the open mouth of the piece will be glued.
I then glue my crocheted piece around the zipper area. Because I have to stretch my crocheted piece to fit tightly over the case, I use clothespins to help keep the piece aligned along the zipper area while the glue sets. Leaving a clothespin on for several seconds will suffice; any longer than that can compress the glue too much making it seep through the stitches as well as leaving an excessively pressed area.
You can see that the top side of the cake will certainly have to be stretched over the case to be glued to the other side of the zipper - that's how tight your crocheted piece should be to avoid slack and uneven shaping.
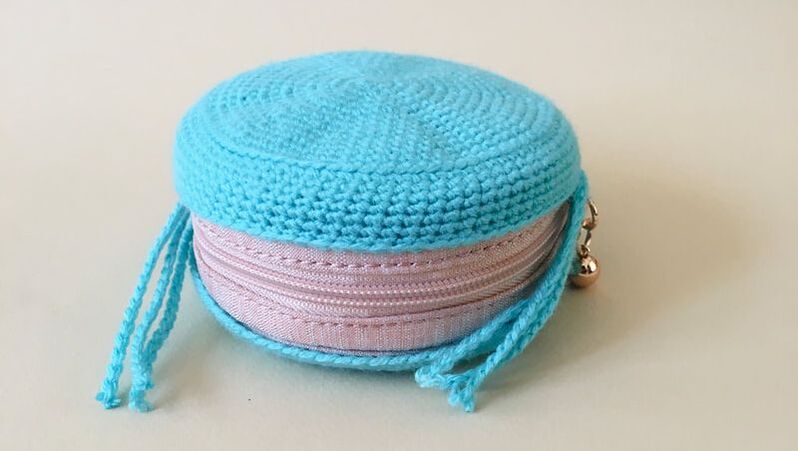
It's ready to be decorated! You can see that the top of the cake looks bumpy as a result from the bas-relief design on the case, and this could be fixed by simply covering it with toppings. Notice also the free loops on the top of the cake. When I stitch my icing to these loops, it will sit on top of the cake rather than at the edge.
Designing the cake case is the best part!